
-
By:
- ophelia
- No comment
nikon em instruction manual
Nikon EM: A Comprehensive User Guide (Based on 04/21/2026 Information)
Welcome! This manual, updated April 21, 2026, provides a detailed exploration of the Nikon EM, assisting you in maximizing its photographic potential.
The Nikon EM, released in 1979, represents a pivotal point in Nikon’s history, offering a more accessible entry into the world of Nikon’s renowned F-mount system. This guide, current as of April 21, 2026, serves as a comprehensive resource for both novice and experienced photographers seeking to understand and utilize this classic camera.
We’ll delve into every aspect, from its core functionalities to advanced techniques, ensuring you can confidently capture stunning images. This manual aims to unlock the full potential of your Nikon EM, providing clear instructions and insightful explanations for optimal performance and enjoyment. Prepare to rediscover the joy of film photography!
Historical Context & Significance
Launched in 1979, the Nikon EM arrived as Nikon’s most affordable SLR at the time, strategically positioned to attract a wider audience to the F-mount system. It was a response to increasing competition from other manufacturers offering more budget-friendly options. Despite being marketed as an entry-level model, the EM retained the core quality and reliability Nikon was known for.

Its significance lies in democratizing access to professional-grade lenses and features. The EM proved remarkably popular, bridging the gap between enthusiast and professional photographers, and solidifying Nikon’s dominance in the 35mm film market. As of April 21, 2026, it remains a beloved classic.

Key Features and Specifications
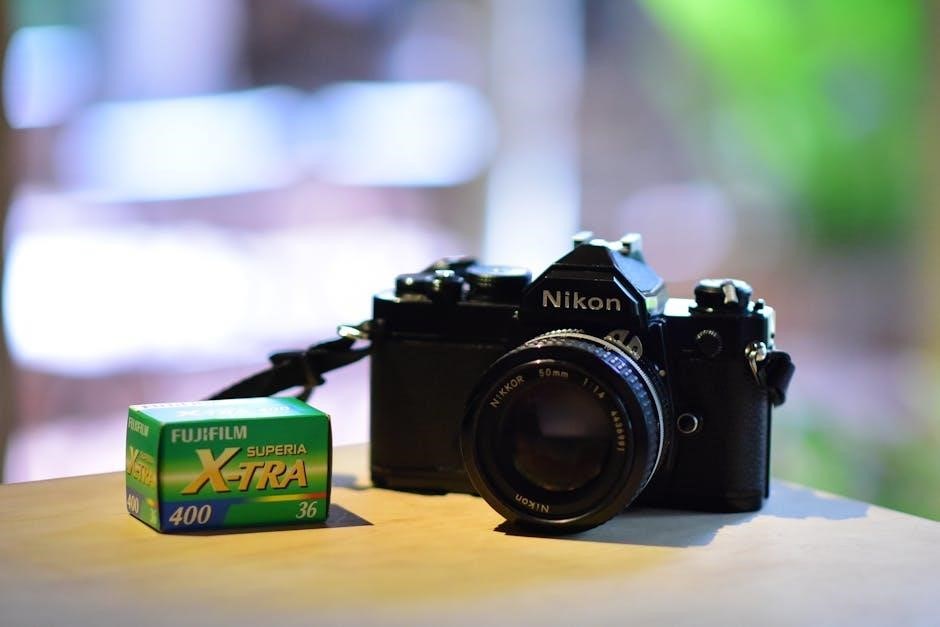
The Nikon EM boasts a horizontally-traveling cloth focal-plane shutter, offering speeds from 2 to 1/1000th of a second, plus Bulb. It features a TTL center-weighted metering system powered by a 4LR44 battery. The camera accepts all Nikon F-mount lenses, including AI and AI-S types.
Key specs include a standard film speed range of ISO 25-3200, a viewfinder offering approximately 93% coverage, and a built-in self-timer. Its compact and lightweight body, weighing around 455g, contributed to its appeal. As of April 21, 2026, these features define its enduring legacy.
Understanding the Nikon EM Body
The Nikon EM’s body is primarily constructed from plastic, contributing to its lightweight design. Key external elements include the film advance lever, shutter speed dial, and mode selector (A for Aperture Priority, M for Manual). The viewfinder provides essential shooting information, including a light meter display.
Located on the camera’s base is the battery compartment, accepting a 4LR44 battery. The back panel houses the film rewind crank and a film counter. Familiarizing yourself with these components, as of April 21, 2026, is crucial for operation.
Physical Components & Controls
The Nikon EM features a prominent film advance lever, requiring a smooth, full stroke to advance each frame. The shutter speed dial, ranging from 2 to 1/4000th of a second, is positioned on the top plate. A mode dial selects between Aperture Priority (A) and Manual (M) exposure.
The viewfinder offers a central focusing spot and LED indicators for exposure. The film rewind crank allows for easy film retrieval. A battery check button confirms sufficient power as of April 21, 2026. Understanding these controls unlocks the camera’s full potential.
Film Loading and Unloading Procedure
To load film, open the camera back using the release latch. Insert the film canister into the left side, ensuring it clicks into place. Thread the film leader across the take-up spool and advance the film a few frames, checking it catches correctly. Close the back securely.
For unloading, press the film rewind button on the bottom plate. Rotate the rewind crank in the direction of the arrow until the film is fully retracted. Open the camera back and carefully remove the film canister as of April 21, 2026.
Exposure Modes Explained
The Nikon EM offers versatile exposure control, primarily focusing on Shutter Priority and Manual modes. Shutter Priority (A mode) allows you to select the shutter speed, while the camera automatically sets the aperture for proper exposure, ideal for action shots as of April 21, 2026.
Manual Mode (M mode) grants full control over both shutter speed and aperture, offering creative flexibility. Note that the Nikon EM does not feature Aperture Priority mode (S mode) found on some other Nikon models. Understanding these modes is crucial for achieving desired photographic results.
Shutter Priority Mode (A Mode)
In Shutter Priority (A) mode, the photographer dictates the shutter speed, and the Nikon EM automatically calculates the appropriate aperture for correct exposure, as of April 21, 2026. This is exceptionally useful when capturing fast-moving subjects, freezing action, or intentionally creating motion blur.
The camera’s metering system continuously evaluates the scene’s brightness and adjusts the aperture accordingly. Remember to monitor the viewfinder’s indicators to ensure a suitable aperture is selected. This mode prioritizes shutter speed control, making it ideal for dynamic shooting scenarios.
Aperture Priority Mode (S Mode ౼ Not Available on EM)
It’s important to note, as of April 21, 2026, that the Nikon EM does not feature an Aperture Priority (S) mode. This functionality, common in later Nikon models, allows photographers to select the desired aperture while the camera automatically sets the shutter speed.
While the EM lacks this mode, understanding its purpose is beneficial. Aperture Priority is favored for depth-of-field control – achieving shallow focus for portraits or maximizing sharpness for landscapes. Nikon EM users will need to rely on Manual mode to achieve similar creative effects, carefully balancing aperture and shutter speed.
Manual Mode (M Mode)
The Nikon EM’s Manual (M) mode, as of April 21, 2026, grants the photographer complete control over both aperture and shutter speed. This is crucial for situations where the camera’s metering system might be fooled, like in challenging lighting or with unusual subjects.
To operate in M mode, set both the aperture ring on the lens and the shutter speed dial on the camera to your desired values. Utilize the viewfinder’s metering indicators as a guide, adjusting settings until the needle centers. Mastering M mode unlocks full creative potential, though it demands a solid understanding of exposure principles.
Metering System & Operation
As of April 21, 2026, the Nikon EM utilizes a center-weighted metering system, prioritizing light measurement in the central area of the frame. This system assesses light levels to suggest appropriate aperture and shutter speed combinations for correct exposure. The metering system operates in both Shutter-Priority and Manual modes, assisting photographers in achieving well-exposed images.
Understanding how the EM interprets light is key. The viewfinder displays a needle indicating exposure; centering this needle generally results in a balanced exposure. However, always consider the scene and adjust accordingly for optimal results.
Metering Range and Accuracy
As of April 21, 2026, the Nikon EM’s metering system functions effectively within an EV range of 3 to 17 at ISO 100, using a 50mm f/2 lens. Accuracy is generally reliable under typical lighting conditions, but can be affected by extreme backlighting or very low contrast scenes.
It’s important to note that the EM’s meter doesn’t account for unusual subject reflectivity. Dark subjects will appear brighter, and bright subjects darker, potentially leading to under or overexposure. Regular checks and understanding these limitations are crucial for consistent results.
Using the Metering Indicators in the Viewfinder
The Nikon EM’s viewfinder features a needle-based metering display, indicating exposure relative to the camera’s programmed settings. A centered needle signifies correct exposure. When the needle moves towards the ‘+’ side, the image will be overexposed, and towards the ‘-‘ side, underexposed.
A small ‘B’ flag appears when the image will be significantly underexposed, while an ‘H’ flag indicates overexposure. Utilize these indicators alongside the shutter speed display to adjust settings and achieve desired results. Remember to consider the scene’s lighting and subject matter.
Exposure Compensation Techniques
The Nikon EM allows for manual exposure compensation, crucial when the camera’s meter is fooled by challenging lighting. Use the exposure compensation dial, typically marked with ‘+’ and ‘-‘ values, to override the metered exposure. Positive compensation (+ values) brightens the image, useful for backlit subjects or snow.
Negative compensation (- values) darkens the image, ideal for bright scenes or subjects. Start with small adjustments (e.g., +0.5 or -0.5 EV) and review results. Practice is key to mastering this technique and achieving consistently accurate exposures.
Focusing System & Techniques
The Nikon EM utilizes a traditional single-lens reflex (SLR) focusing system, relying on manual focus achieved through the lens. Rotate the focusing ring on your lens until the image in the viewfinder appears sharp and clear. Precise focusing is paramount for image quality.
Pay attention to the focusing aids within the viewfinder – split-image or fine-matte focusing screens are common. Understanding depth of field is also crucial; a smaller aperture (higher f-number) increases depth of field, keeping more of the scene in focus.

Focus Screen Options & Adjustment
The Nikon EM typically shipped with several focus screen options, including split-image and fine-matte variations, impacting focusing ease. The split-image screen presents a divided view; aligning the two halves indicates focus. Fine-matte screens offer a textured surface for easier contrast assessment.
While the focus screen isn’t user-adjustable in the field, it can be replaced with aftermarket options offering different patterns. Caution: Screen replacement requires careful disassembly and reassembly of the viewfinder and should only be attempted by experienced technicians.
Depth of Field Control
Understanding depth of field (DoF) is crucial for sharp images. The Nikon EM’s aperture ring directly controls DoF – smaller apertures (higher f-numbers like f/16) yield greater DoF, keeping more of the scene in focus. Conversely, wider apertures (lower f-numbers like f/2.8) create shallow DoF, isolating the subject.
The EM’s depth-of-field preview lever allows visualizing the effect of your chosen aperture before shooting. Remember that DoF is also influenced by focal length and subject distance; longer focal lengths and closer distances reduce DoF.
Using Nikon EM Lenses
The Nikon EM utilizes the renowned Nikon F-mount, offering compatibility with a vast array of Nikkor lenses. While it functions optimally with AI and AI-S lenses – featuring an aperture index lever – older non-AI lenses can be used with an adapter, though full functionality might be limited.
Ensure the lens is securely mounted and the aperture ring is set to a valid value. The EM’s metering system works in conjunction with the lens aperture, so accurate aperture settings are vital for correct exposure. Regularly check lens elements for cleanliness.
Compatible Lens Mount (F-Mount)
The Nikon EM proudly features the standard Nikon F-mount, a robust and widely adopted lens mount system. Introduced in 1959, the F-mount has remained largely consistent, ensuring compatibility with countless Nikkor lenses produced over decades. This broad compatibility provides photographers with extensive creative options.
This mount allows for a secure and precise connection between the camera body and the lens, crucial for optimal image quality. Adapters are available for using lenses from other systems, but native F-mount lenses deliver the best performance.
AI and AI-S Lens Compatibility
The Nikon EM exhibits excellent compatibility with both AI (Automatic Indexing) and AI-S (Automatic Indexing ౼ Superior) Nikkor lenses. AI lenses, introduced in 1977, feature a mechanical coupling tab for improved aperture control. AI-S lenses, appearing in 1986, further refined this system with enhanced automation and a superior finish.
The EM fully supports the aperture automation features of these lenses, allowing for seamless control over depth of field and exposure. Older non-AI lenses can be used with an adapter, but will require manual aperture control.
Advanced Features & Settings
The Nikon EM, while user-friendly, offers several advanced features for creative control. The built-in self-timer allows for delayed shutter release, perfect for self-portraits or group photos. Its multiple exposure capability enables layering of images within a single frame, fostering artistic experimentation.
Explore the film rewind release for mid-roll film retrieval. Understanding these settings expands your photographic possibilities beyond basic operation, unlocking the EM’s full potential for both novice and experienced photographers.
Self-Timer Functionality
The Nikon EM’s self-timer is activated by the lever located on the left side of the top plate. Lifting this lever initiates a roughly 10-second delay before the shutter releases, allowing you to compose yourself in the frame. Ensure the camera is stable on a surface or tripod to avoid blur during the delay.
After activation, a small lamp illuminates in the viewfinder, counting down the remaining time. Pressing the shutter button during the countdown cancels the self-timer. This feature is ideal for portraits or situations where you need to be included in the photograph.
Multiple Exposure Capability
The Nikon EM allows for creative multiple exposures by utilizing the rewind knob and shutter release. After taking your first exposure, do not advance the film. Instead, press and hold the film rewind knob inwards, then re-cock the shutter and take your second exposure on top of the first.
Repeat this process for additional layers. Releasing the rewind knob allows normal film advance. Be mindful of overexposure; each subsequent exposure adds light to the final image. This technique opens doors to artistic effects and surreal imagery.
Troubleshooting Common Issues
Film Advance Problems: If the film isn’t advancing, ensure the film leader is correctly engaged on the take-up spool. Check the rewind knob is fully pushed in during winding. A sticky shutter mechanism can also cause issues; professional cleaning may be required.
Metering Errors: Inaccurate readings often stem from weak batteries. Replace them with fresh ones. Verify the ASA/ISO setting matches your film’s speed. If problems persist, the metering cell might be faulty, necessitating repair by a qualified technician.
Film Advance Problems
Issue: Film isn’t advancing smoothly or at all. Solution 1: Confirm the film leader is securely engaged onto the take-up spool. Gently guide it if needed. Solution 2: Ensure the rewind knob is fully depressed; it must be to allow proper film transport. Solution 3: A sluggish shutter can impede advance – listen for a clean ‘click’.
Further Checks: Inspect for any obstructions within the film chamber. If the problem continues, a professional camera technician should examine the mechanical components for potential issues or needed cleaning.
Metering Errors
Problem: Inconsistent or inaccurate light readings. Troubleshooting 1: Verify the battery is fresh; a weak battery significantly impacts metering accuracy. Troubleshooting 2: Ensure the lens aperture ring is correctly set – the camera relies on this information. Troubleshooting 3: Check the ISO setting on the camera matches the film’s speed.
Advanced Checks: Examine the viewfinder’s metering indicators for erratic behavior. If errors persist, a calibration check by a qualified technician is recommended to ensure reliable exposure measurements.
Maintenance and Care
Cleaning: Gently wipe the camera body with a soft, dry cloth. Avoid liquids or abrasive cleaners. Use a blower brush to remove dust from the film chamber and lens mount. Storage: Store the Nikon EM in a cool, dry place, away from direct sunlight and extreme temperatures.
Periodic Checks: Regularly inspect the light seals for deterioration, replacing them if necessary to prevent light leaks. Professional servicing every few years ensures optimal performance and longevity of your classic Nikon EM.